Mommy helped
The love of enjoying new crafts and fun ideas with my daughters inspired this blog. Please enjoy!
The girls and I have a great time making things and being silly. We welcome new ideas and love to hear from you! Thank you for stopping by!
Tuesday, July 1, 2014
Princess hair bows to match any outfit! This hair bow is as simple as loop..loop..glue.
We made rings of ribbon, stacking along the way, adding hot glue. You can find these adorable colored bottle caps at a craft store that come with the resin "bubble" insert to add a dome to your picture. The picture is a simple cut out of just about anything you like.
You can find hair clip back just about anywhere and adhere those with a small piece of felt or just as they are. These are very fun and next time I may even remember to photograph the process.
Manicures are a great way for you and your daughters to feel extra glamorous. The foil kit we used cost me a mere $4.50 and provided enough material for another several manicures. Play around with different textures and even do the cucumber eye thing if you want to be extra pampered for your mommy/daughter day.
Have you been looking for a super simple time waster for the kids this summer? I have to say that some dish soap and water in a dish with a straw kept my daughter occupied for at least an hour. We added food coloring and experimented.
Between us... I just wanted to get the dishes done and was quiet for some time with this. Enjoy!
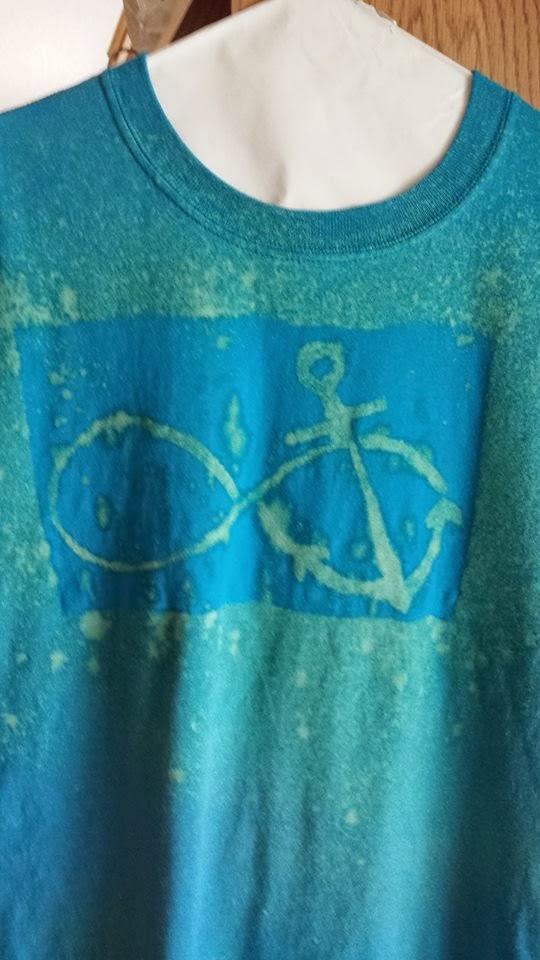
Super fun and super simple project that you can do with the kids. Bleach dyed t-shirts are easier than they look.
You will need:
T-shirts (dark colors work best)
Spray bottle
Bleach
Water
Contact paper
Step 1. Find a design you love to print out or just wing it and design your own image.
Step 2. Create a stencil using the contact paper
Step 3. Adhere your design to the shirt
Step 4. Mix 1/2 and 1/2 water to bleach in your spray bottle
Step 5. Spray away! The color changes quickly for most t-shirts but be especially careful when
working with little ones. Take care to wash hands thoroughly.
Step 6. Let air dry and viola! Safe to wash and dry.
Tuesday, February 7, 2012
Love Bug Valentine box idea
If you have some spare parts, you can create this adorable love bug for your child's valentines at school or at home.
Coffee can
Streamers (we used pink and black) or colored paper
Fun foam or card stock for antennas and eyes
Markers and tape for attaching and making eyes
Wrap can in pink streamers or paper. Add heart shapes spots with glue or tape.
Cut a hole for the mouth
Affix eyes and antennas
Coffee can
Streamers (we used pink and black) or colored paper
Fun foam or card stock for antennas and eyes
Markers and tape for attaching and making eyes
Wrap can in pink streamers or paper. Add heart shapes spots with glue or tape.
Cut a hole for the mouth
Affix eyes and antennas
The kids can put the valentines in the mouth and it will hold quite a few.
Let your child do most of the work, after all a love bug is best shared. :)
Friday, January 13, 2012
Rustic Apple Dumplings:
Enjoy with a scoop of ice cream or in a bowl with a bit of milk. Yum!
Pie dough of your choice
4 Medium sized apples (peeled and cored then sliced)
1/2 cup brown sugar
1tsp cinnamon
1/2 tsp all spice
Double pie shell dough
Directions:
Mix all ingredients (except dough) in large bowl.
Roll out 3 rounds of pie crust dough
Divide apple mixture in 3 and place in dough rounds
Cover apples and make a ball, place in a baking dish
Bake at 400 degrees for 35-40 minutes
Subscribe to:
Posts (Atom)